Hello!
Thanks for dropping in! I am so pleased that you did! Grab a cup of tea and a biscuit and take a peek at this tutorial. Scroll to the bottom for more cute, colourful crochet projects! Or head here if you can’t quite manage the scroll!


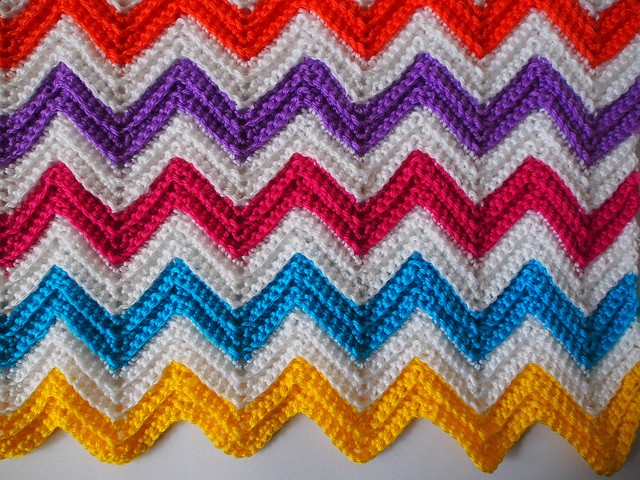
I told you I’d show you how to make this! It only took 8 hours to put together…! I hope it’s totally useful and you make lovely blankets and things! Let’s do it!
Please note I went a bit mental trying to count the foundation chain stitches. I tested it a few times so hopefully you won’t end up with extra stitches! If you do, just weave them in at the end…!
How to make this cute pattern…
Follow the photos!
Refer to the notes below if you get stuck..
And check the video for extra pointers!
I am using AUSTRALIAN/UK terminology.
Convert from US here.
I used a 3.5mm crochet hook and bright acrylic yarn by Marvel from Spotlight
Stitches used:
Chain stitch
DC – Double Crochet
DC 2together : hook into the first chain, pick up yarn and pull through, hook into the second chain, pick up yarn and pull through, yarn over, pull through all three loops
Foundation Chain:
Crochet your foundation chain: you need to chain multiples of 17 PLUS an extra 16. Your work will not be as wide as your chain, because you need to allow for the zig-zag. The zig-zag will make your work about a 1/4 narrower than your chain so allow for that!
Row One:
DC the first two chain stitches together. (To do that – hook into the first chain, pick up yarn and pull through, hook into the second chain, pick up yarn and pull through, yarn over, pull through all three loops.) This forms a nice firm edge for the side of your blanket.
DC once into each of the next 5 chains.
*DC three times into the next chain stitch.
DC once into each of the next 7 chain stitches.
Skip the next two chain stitches.
DC once into each of the next 7 chain stitches.*
Repeat the pattern between the * and the * ending by crocheting the final 7 chain stitches like this: one DC into each of the next 5 chains and DC2gether in the last 2 chain stitches.
(If you miscounted your final batch of stitches, just add a sneaky one or stitch a couple of stitches together! The aim is to have each row end with 7 stitches – those being 5 DC and 2 DCtogether – and the same at the beginning of each row, too!)
Row Two:
Turn your work and chain one.
Repeat Row One. If you would like the ‘ridge’ in your chevrons, crochet only into the BACK LOOPS of the stitches in the row below (watch my video on this page to see how to do that!!)
Rows Three Onwards:
Repeat Row One.
Notes:
The TOP hump of the chevron/zig zag is formed by the 3DCs into one stitch in the row below.
The DIP of the chevron/zig zag is formed by skipping two stitches.
Each chevron/zig zag has 7 stitches down each side (between the dip and the hump!)
EXCEPT at the beginning and end of the row where it’s 5 DC and 2 DCtogether
If you end up with too many stitches in your foundation chain, just ignore the extras and sew them in later! I hope I got the foundation stitch count right! I did test it 3 times!
To change colour, just tie off your previous colour at the end of the row and tie in a new colour. Crochet as usual with the new colour.
Loose ends can be crocheted in as you go or you can weave them in later with a yarn needle.

More about crochet!
How to hold your yarn for crochet
How to weave in your ends when crocheting
More cute crochet tutorials on my blog:
How To Crochet A Larksfoot Blanket

Easy Tea Cosy To Crochet

Age Before Beauty Crocheted Blanket

Crochet A ‘Paper Chain’

How To Crochet A Granny Square

How To Crochet A Hexagon In Ten Minutes

How To Crochet A Ripple Blanket

41


