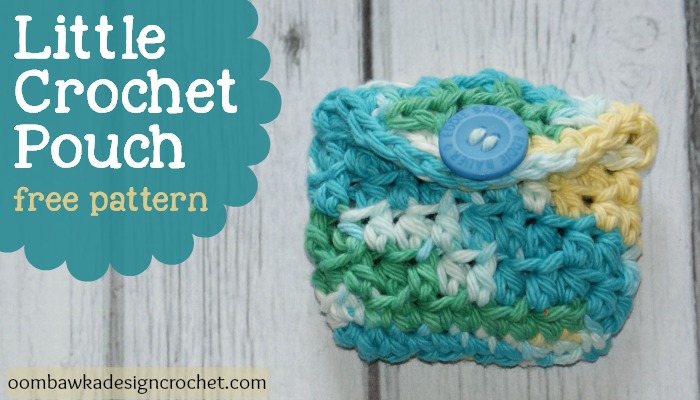
LITTLE CROCHET POUCH – FREE PATTERN

LITTLE CROCHET POUCH – FREE PATTERN
This super simple and quick project is for me – I thought I would share it in case anyone else needed one too!
Before I had children I used to read – A LOT – of books. Since having them I find it very difficult to make time to pick up a book and just read.
I have adapted – by listening to audiobooks.

It took me a while to get used to it but now I LOVE being able to listen to my favourite authors’ books while being free to do other things at the same time – like crochet, garden, or drive, or even watch the children play at the park.
One thing I realized I needed was a little pouch or bag to hold my headphones in – otherwise I just tossed them into my purse – and they came out tangled and even knotted!
So this is why this simple little pattern has been written. I’m sure you can use the pouch for other purposes – but for me – it is to hold my headphones! Here is today’s free pattern.
Free Crochet Pattern
Little Crochet Pouch
Hook: 5.00 mm (H)
Yarn: Bernat Handicrafter Cotton Yarn (Worsted Weight Kitchen Cotton)
Abbreviations Used: ch – chain, st – stitch, sc – single crochet, fl – front loop, bl – back loop, hdc – half double crochet,
Finished Measurements: 3″ wide by 2.75″ tall
Note you will be working around the beginning chain row in R1
R1: ch 10, starting in the 2nd chain from the hook, 1 sc in the back bump (need help? view this tutorial: Alternate ways to work in the Starting Chain) of each ch st across, (turn 90 degrees clockwise) 1 sc in the end of the row, (turn 90 degrees clockwise), 1 sc in each fl across, (turn 90 degrees clockwise) 1 sc in the end of the row [20]
You will now be working in spirals. Do not sl st to join or add extra chain stitches at the beginning of the rounds/spirals.
R2: (1 hdc in the fl of the 1st st, 1 hdc in the bl of the next st) around [20]
R3-R6: Repeat R2 [20]
Now to bring you to the edge you will do the following:
(1 hdc in the fl of the first st, 1 hdc in the bl of the next st) 2 times in total (so four stitches), ch 1 and turn
You will now be working flat over a set number of stitches to create the flap
R7: skip the 1st st, (1 hdc in the bl of the 1st st, 1 hdc in the fl of the next st) 4 times, 1 hdc in the bl of the next st, ch 1 and turn [9]
R8: skip the 1st st, (1 hdc in the bl of the 1st st, 1 hdc in the fl of the next st) 4 times, ch 1 and turn [8]
R9: skip the 1st st, (1 hdc in the bl of the 1st st, 1 hdc in the fl of the next st) 3 times, 1 hdc in the bl of the next st, ch 1 and turn [7]
R10: skip the 1st st, (1 hdc in the bl of the 1st st, 1 hdc in the bl of the next st), ch 2 (skip the 2 stitches under the ch 2), (1 hdc in the bl of the 1st st, 1 hdc in the bl of the next st)

To edge the opening (working in a round):
R1: 1 sc in each row end, 1 sc in each st and 1 extra stitch in each corner, around
R2: 1 sl st in each st around, finish off and weave in ends
I added a button to the pouch that would fit through my ch-2 space – my button is 2 cm in diameter.

